Feb 24, 2014
Gluing Efex
Gluing Efex is as easy as 1,2,3.
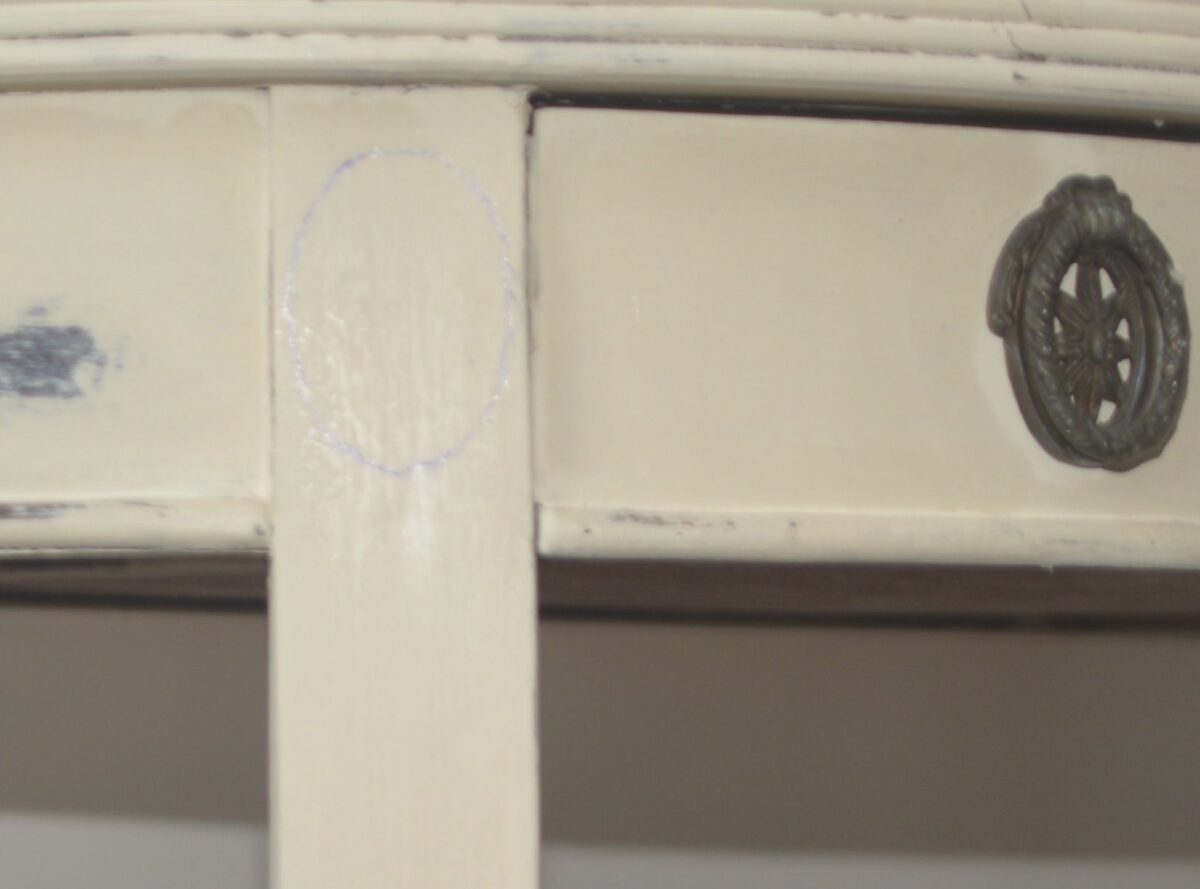
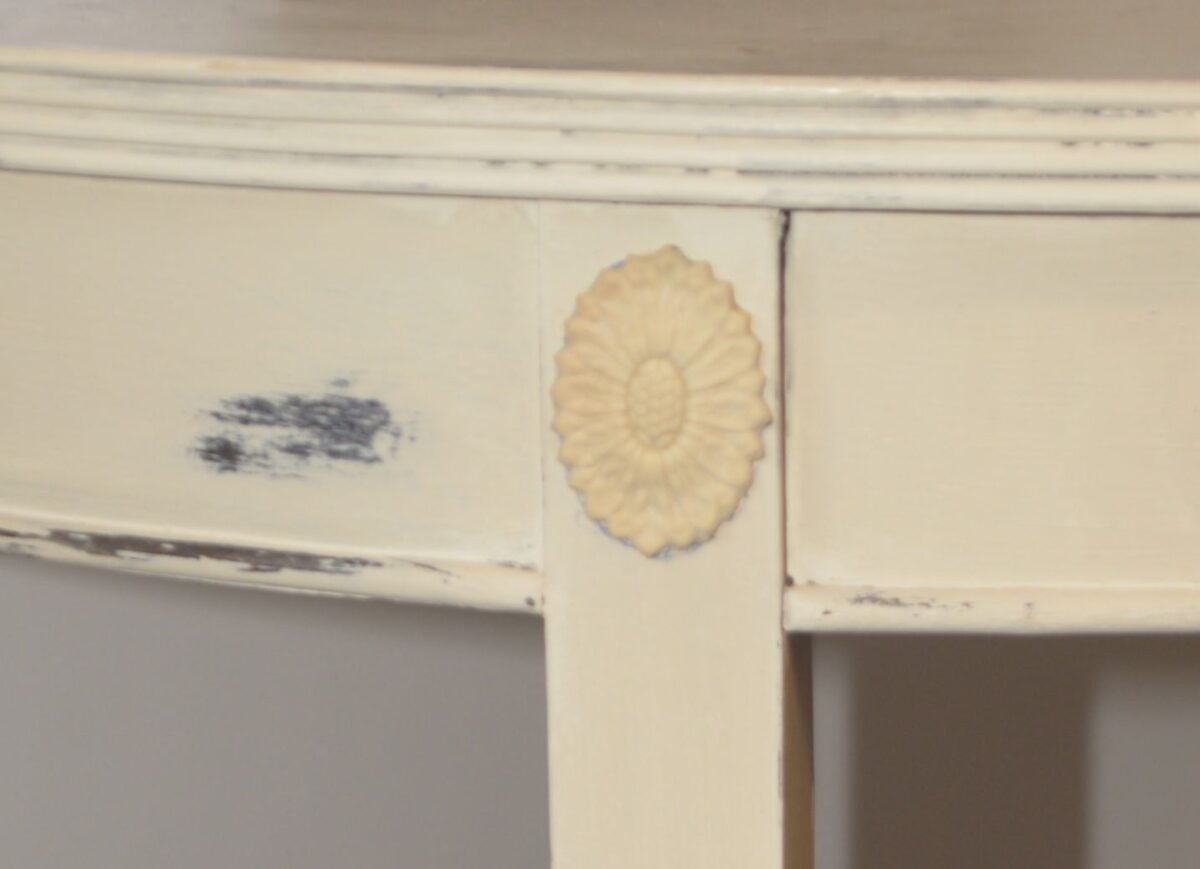
Step 1- pre-fit your moldings and trace the outline of the molding with a pencil or chalk.

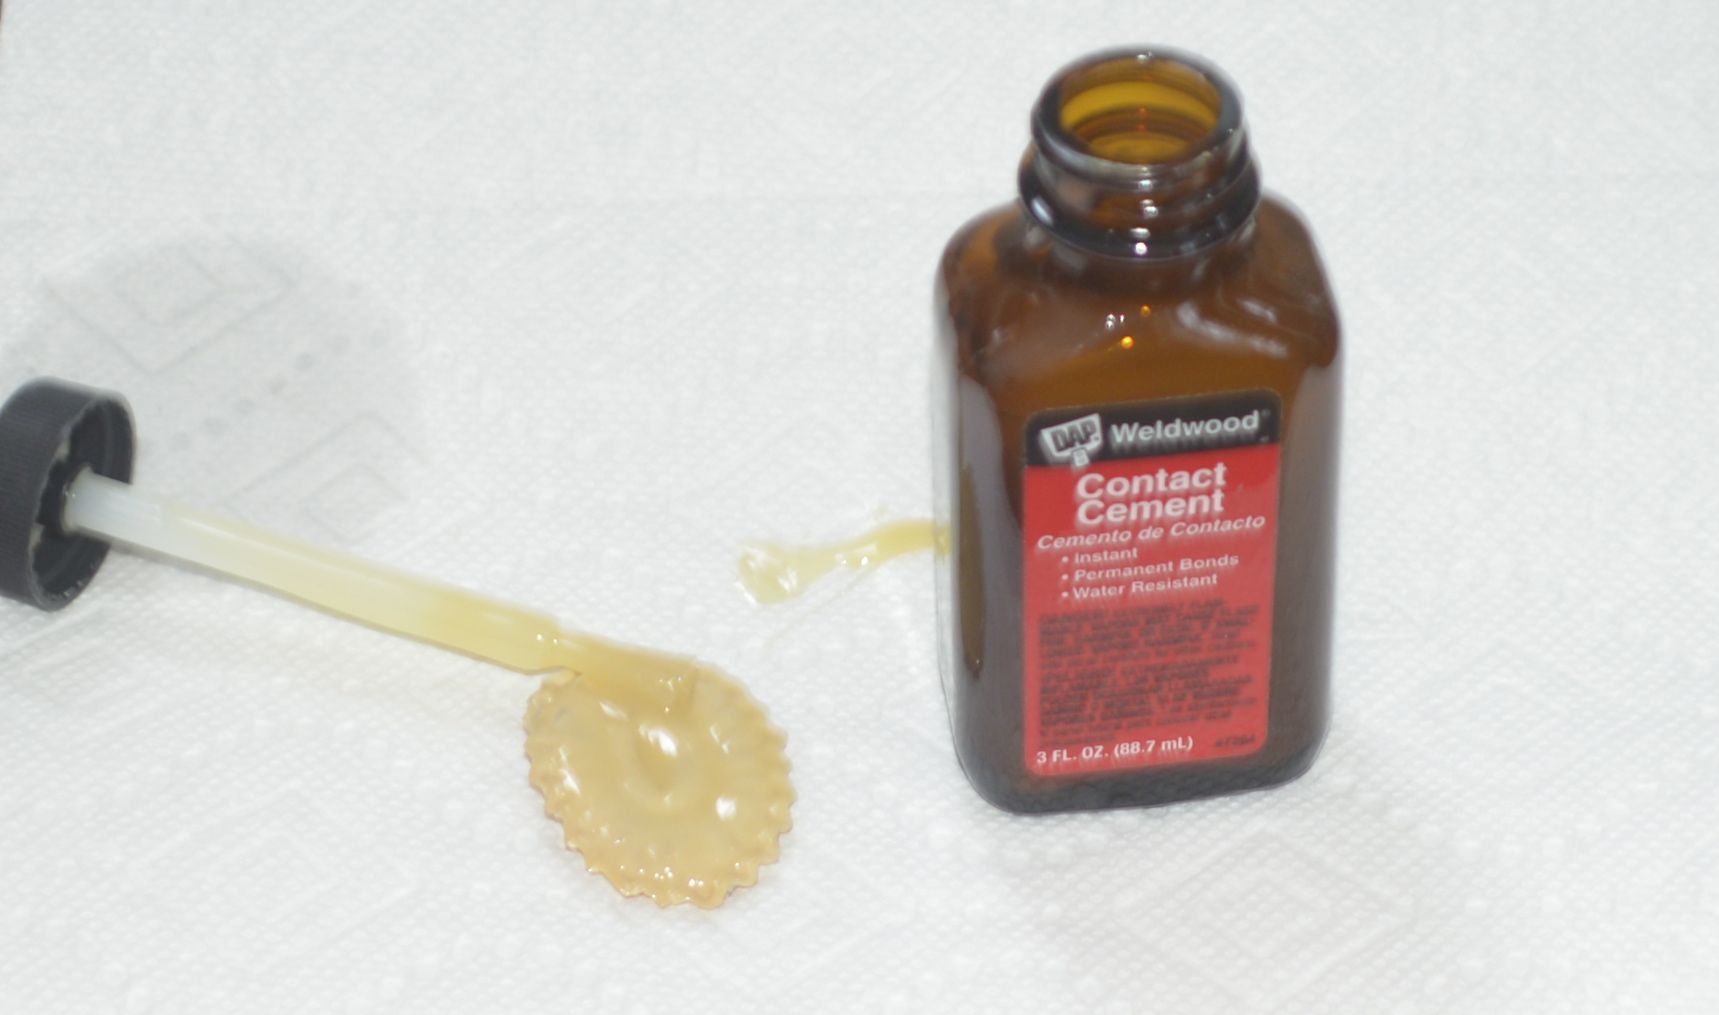
Step 2 – use contact cement to glue your Efex. This weekend we tested Dap Weldwood products from Lowes and both of them worked very well. I prefer the small bottle that comes with a brush, but the gel and a chip brush work just as well.
Step 3 – When using contact cement, you brush on the glue on the back side of the molding and on the surface you are attaching it to.

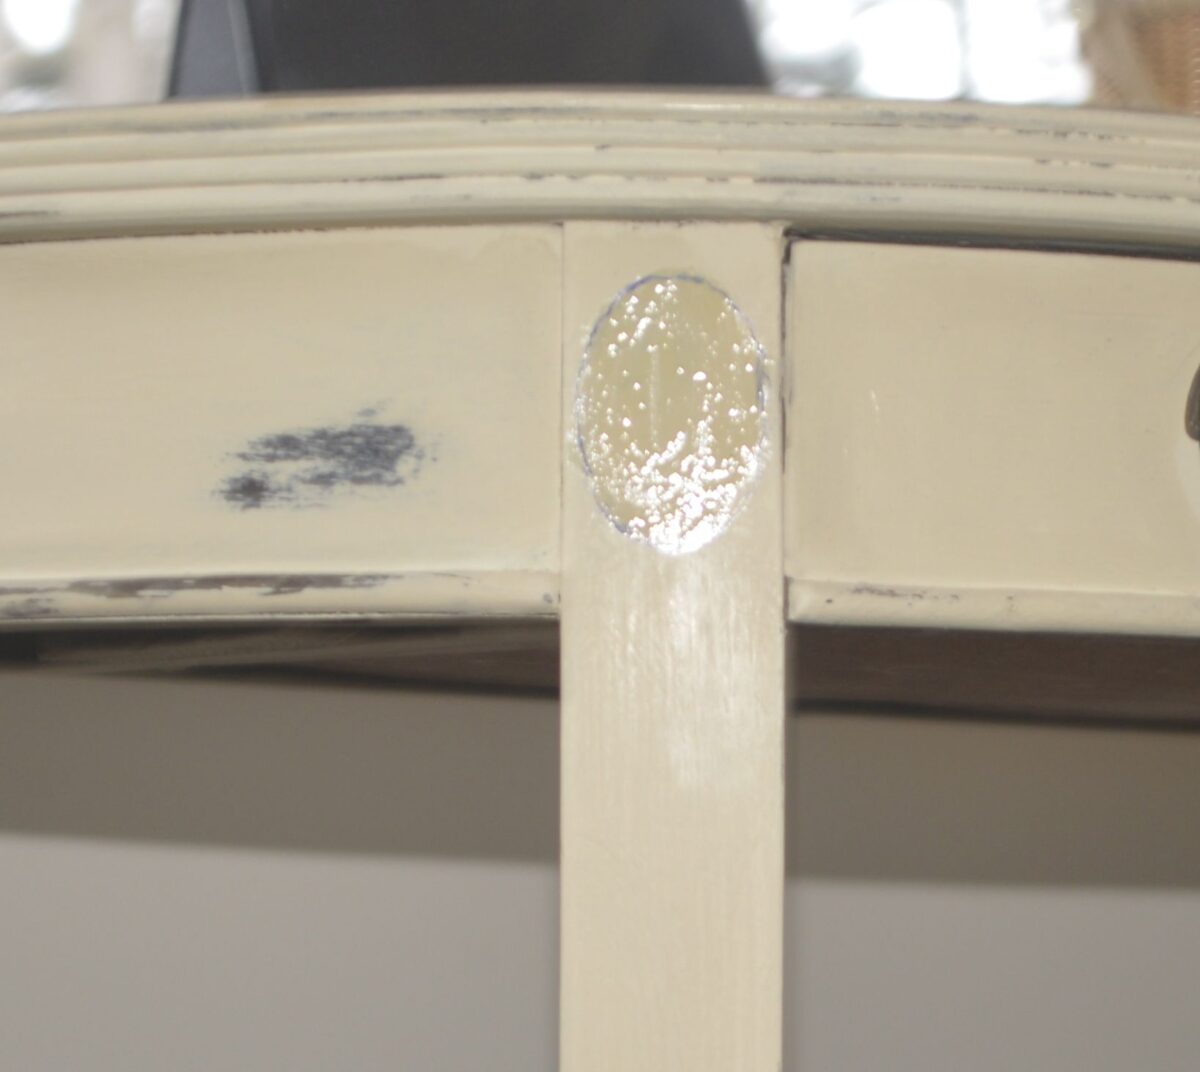
Step 4 – wait until the glue is just dry. Depending upon temperature and humidity this takes around 15 – 30 minutes. If the glue is still tacky you won’t get a great bond, so patience is key.

Step 5 – when the glue is dry to the touch, carefully press the molding onto the surface where the glue is. When gluing efex You want to aline the molding correctly the first time, because you don’t get a second chance. Press all of the edges and make certain they are attached.
Even when working on a horizontal surface, you don’t usually need clamps if you do then you either need to let the glue dry a little more, or push harder.

That’s it. Simple as that.
Wait for about an hour before applying paint or stain. Please remember to read all manufactures instructions. To clean up glue around the edges, use low VOC mineral spirits.
This week we will test other brands from other common hardware stores.
Feb 22, 2014
Unpacking Efex
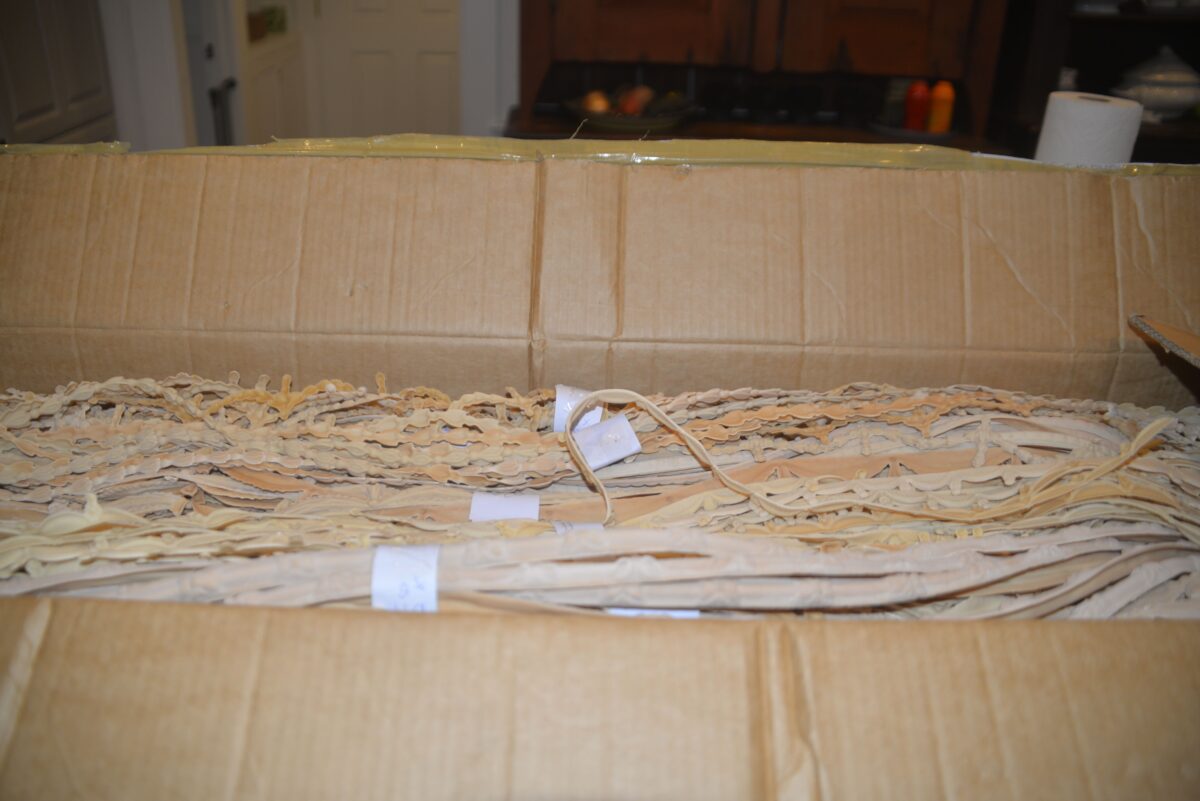
Unpacking Efex has been a lot of fun but boy has it been a whirlwind week. We’ve had a great time imagining what different places all these nifty moldings could go on.
We took a break from all the bagging and tagging to finally play and see what these latex pieces could do!

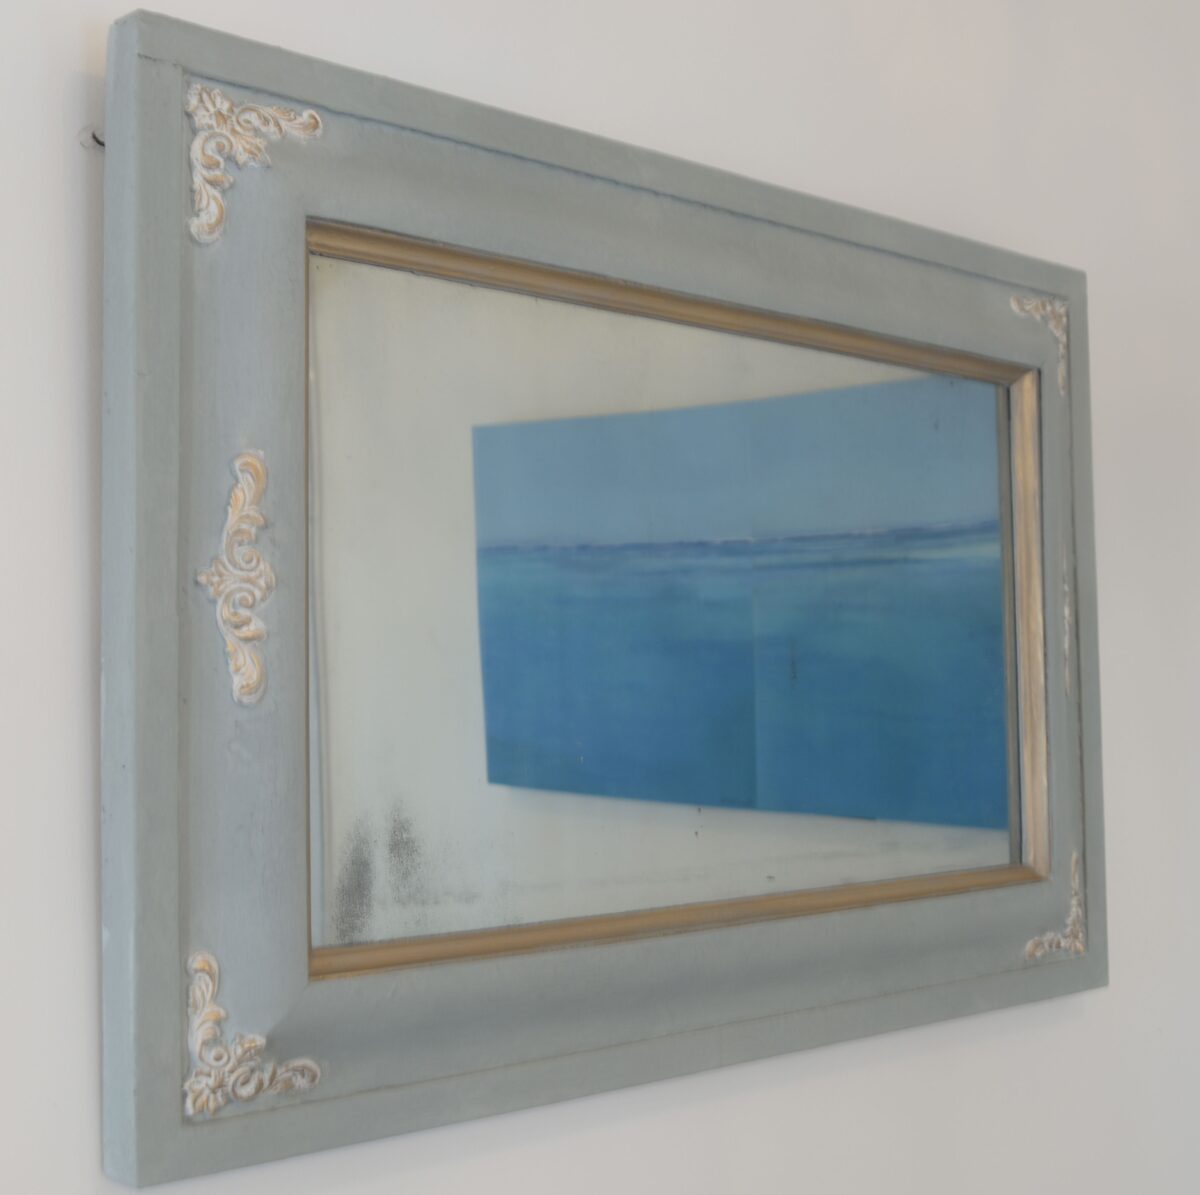
We chose this lovely large mirror to adorn with some scrolly corners and pediments.
It’s always a good idea to lay out the pieces you’re thinking of using…I had grabbed about three different trims and corners before I settled on ones I liked!
We ended up using corners C45 and pediments P15 which are very similar.
To adhere the Efex. Stay tuned for a comprehensive rant about contact adhesives, they’re not all going to work! As a side note: we would suggest staying away from rubber cements/contact cements found at your local crafting store. The sticking power just isn’t there.
It’s a good idea to wear disposable gloves when working with these high grade adhesives, take it from me! I think I’ve finally gotten all the glue off my fingers…
And the most important take away from this play day is: have patience! Once you’ve applied adhesive to both the Efex molding and the surface, wait. The tackier the adhesive becomes, the easier it is for the piece to stay they first time.
 Miss Ivy couldn’t stand the waiting…
So after a few choice words, and a lot of patience, we stepped away from a mirror frame we could be proud of!
First coat: Duck Egg, second coat: Old White, then gold gilding wax to accent the Efex
Don’t miss our in depth look into the world of contact cements in the next few weeks!
Happy Efex-ing!
– Samantha

Feb 14, 2014
Decorative Moldings – Efex
Decorative Moldings – Efex have arrived. Despite the nation wide snow storm, and not without some drama, boxes full of thousands of moldings are in Maine.
For our snow day today we are packaging and labeling. They will be ready to ship on Monday. Check back for more details on Saturdays post.

These lovely moldings are hand made in New Zeland of latex. They are easy to use especially on furniture because they are bendable.