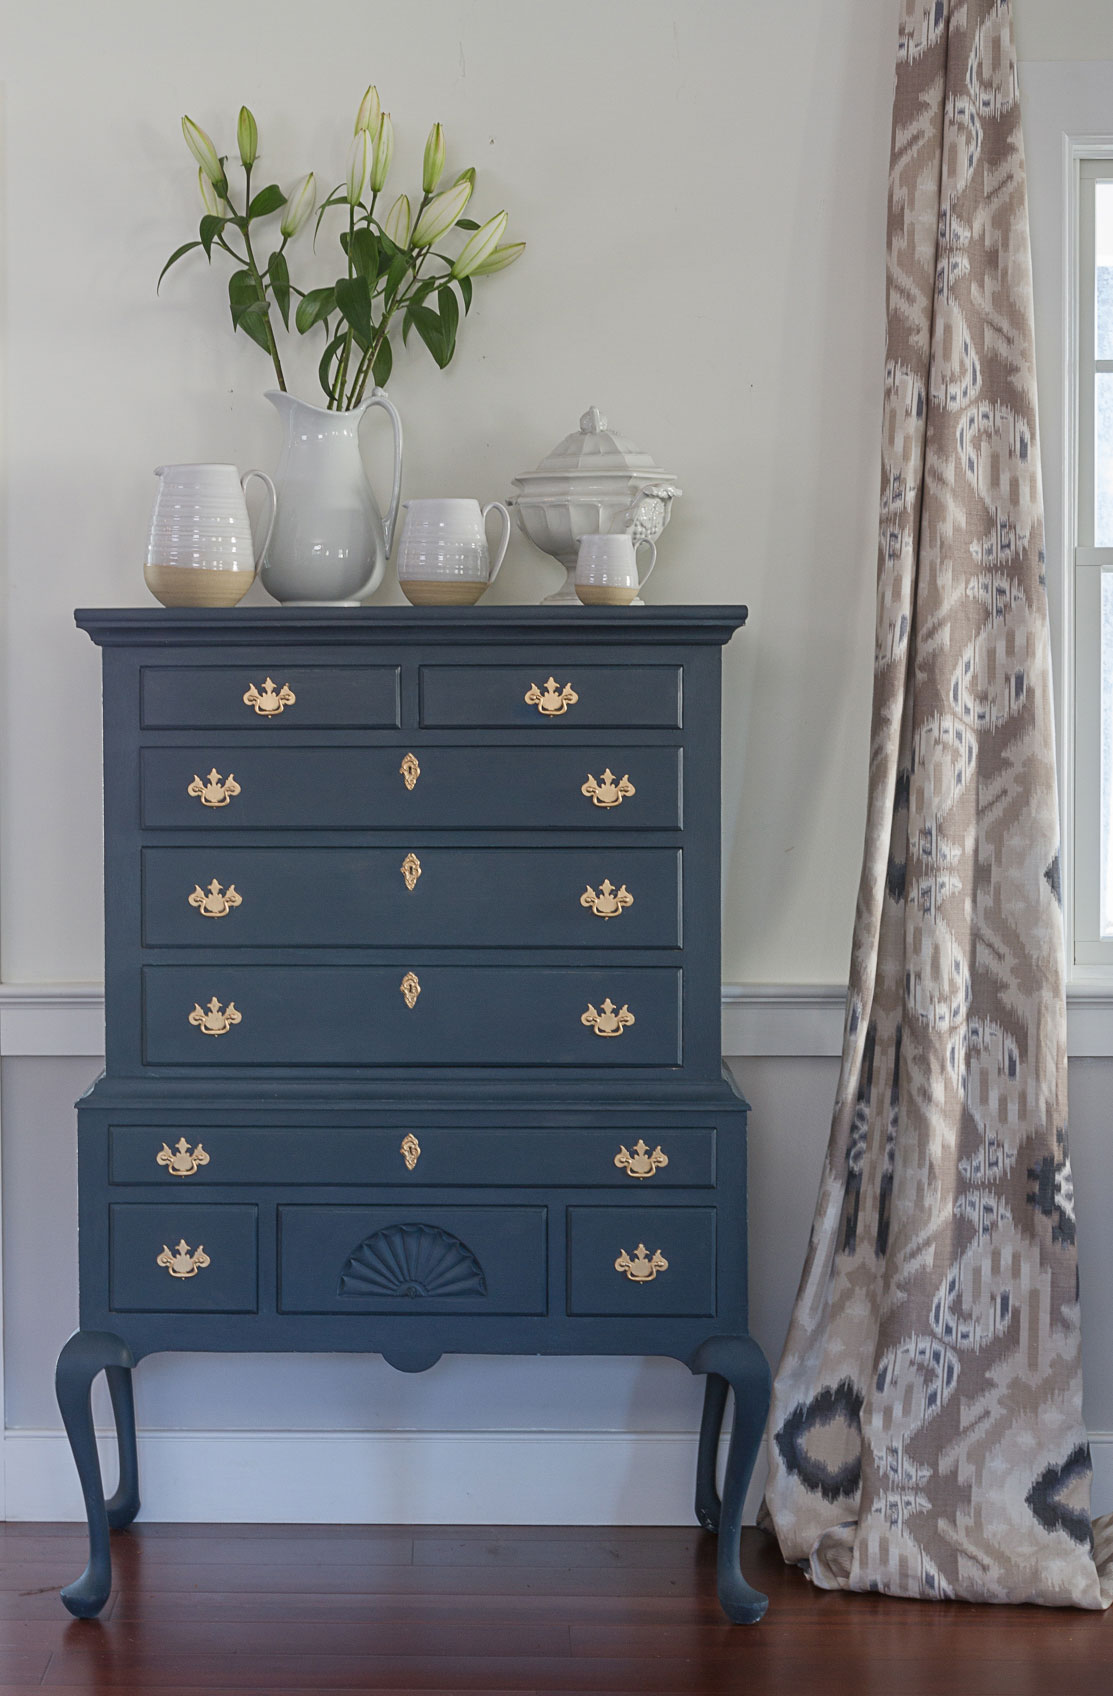
Our Efex video series shows off many of the different styles of Efex. Today we’re showing – “How To Dress Up A Dresser…Escutcheons”.
We have 4 different escutcheons. The little petite E1 is just perfect for small projects, and E2 has a little more curvy detail. E3 is tall and skinny, perfect for a taller piece or behind drawer pulls. And E5 is just an elegant lady. Where’s E4? We’ll you’ll just have to stick around to find out!
What’s that I hear you saying? What’s an escutcheon?
Simply put a fancy French word for key hole cover.
We used E2s to makeover this lovely navy blue highboy.
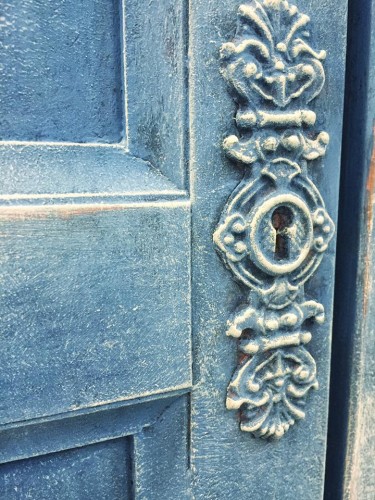
While E3 turned this IKEA hack from modern to classic.
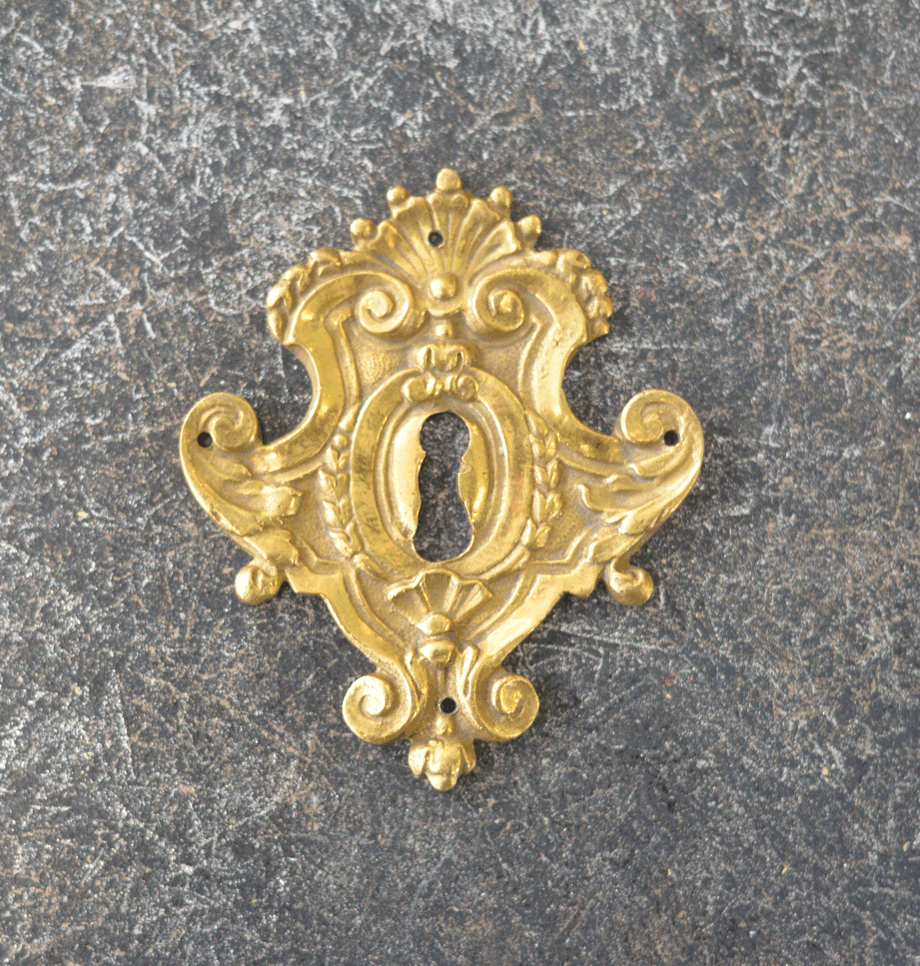
Here is the original bronze of our fabulous French E5.
So whether you’re dressing up naked keyhole covers, or making faux ones, you just can’t go wrong with these escutcheons.
Visit a retailer near you online or in store to find these and more!
Today I’m going to change your relationship with crud. No, I’m not talking about the stubborn white stuff you can’t scrub off your shower walls no matter how much elbow grease you apply. And for my readers in ski country, I don’t mean powder with tracks.
I’m singing the praises of sawdust, a.k.a. “crud”, today’s resist in my series of posts on How to Get that Chippy Look. I was surprised, too, when I first learned this technique from our Efex stockist Janet Metzger of the Empty Nest. Even my husband thought he was cleaning up after me when he tried to wipe the sawdust off of my unattended work-in-progress!
But crud is easy to make and you can probably get the sawdust for free at your local hardware store. Just sweetly ask the guy in the lumber area if you can please sir have a little. Don’t forget to BYO baggie!
Read on and we’ll show you how easy it is:
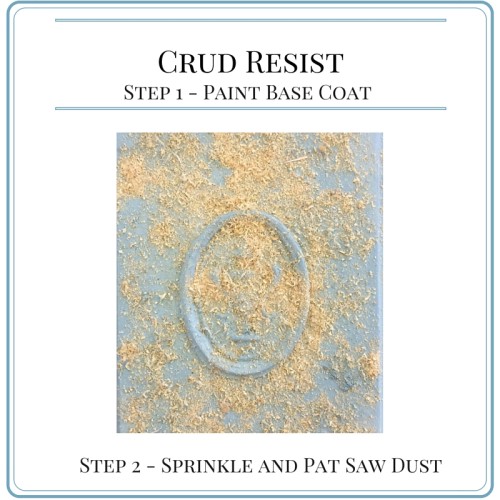
Step 1 – apply a base coat of paint to your project. We used two coats of Duck Egg Blue on our sample board.
Step 2 – While the paint is still wet sprinkle the saw dust on your project. Yep…right on top of the wet paint! it might sound a little crazy but we promise it works.
Pat lightly so the saw dust adheres, it won’t all stick to the paint but that’s OK. Let the paint fully dry about an hour.
Step 3: Once your base coat is dry paint over the saw dust with a contrasting color. The surface will start to look crusty and messy, but hence the term “crud”. Now you should have a nice chunky finish with sawdust everywhere. (You can probably understand my husband’s reaction!) In the end, you’ll get a very rustic, chunky, authentic finish.
Step 4: When the final coat is dry use a razor or a paint scraper to gently scrape off the saw dust. It will immediately start to take on a very rustic finish, like an old barn door. You can even scrape right through to the wood. Get rid of the mess, and clean it up.
Step 5: Finish by waxing and sanding. Use clear wax first, and then add dark wax and voila: Patina in no time!
So there we have another ways to get the chippy look using a resist.
The chair in the photo below was refinished using the crud technique layering Annie Sloan Chalk Paint® in Old White and Old Ochre with a base of Aubusson Blue. You can even use crud on Efex appliqués to make the moulding look like an old worn wood carving! Like it’s been there for years and years.
If you have any questions please feel free to comment or send us an email. Our dealers carry many of the products used so stop by a local stockist in your area.
Caio, until next time when we show you how to get patina using other techniques.
Do you love “shabby chic” furniture, that aged aesthetic made so popular by designer Rachel Ashwell? Do you stroll through your favorite antique shop and drool over pieces that have of older, chipping paint? If you said yes to either of these questions join us and learn how to get the chippy look.
Let’s think about those antiques with chips and dings in them. Those chips occur naturally on edges and sides of tables in what we like to call “high traffic areas”. Places that would have seen daily use and abuse. But, they also appear on flat areas over time usually from dampness and humidity or extreme cold.
The style speaks to a well-used piece of furniture. Today we’re going to share with you a great video as well as outlined all the steps necessary to get the chippy look.
Our friend Marion Parsons, a.k.a. Miss Mustard Seed, is the queen of chippy furniture. She has perfected this style with her brand of Milk Paint and finishes. It literally chips off as it dries, revealing whatever lies underneath.
In the world of decorative painting there are many ways to get paint to flake off for this aged look. Most of the time we use one of three different techniques to get the paint to chip. All of them work very well with Efex bendable mouldings.
A “resist” is a two step process where you layer a resist medium (like Hemp Oil) in between two coats of paint. Think of the resist as the frosting between two layers of cake, and the cake is your two paint colors. You can even do a resist over the initial painted or wood surface. Basically, the resist medium keeps the second coat of paint from adhering to the undercoat.
Three great resist techniques are:
•Hemp Oil resist with Milk Paint
•Wax resist with Annie Sloan Chalk Paint®
•Crud resist with Annie Sloan Chalk Paint®
Start your chippy journey by watching Miss Mustard Seed, in this great video. Then see the 4 easy steps on how to make this work for you.
Milk Paint Hemp Oil Resist
This painting technique is so easy, you can do a pretty big project in just a few hours over a weekend.
The Hemp Oil resist works best when using Miss Mustard Seed’s Milk Paint. First, if you are new to this technique, we recommend that you start by practicing on a sample board.
Step 1 – Pick two colors that you think will complement one another.
We did two sets of sample boards to show you how-to-do a Hemp Oil resist. Both had very different outcomes.
In example 1 Eulalie’s Sky is the base coat and Mustard Seed Yellow is the top.
In example 2 Ironstone is the base and French Enamel is the top coat. Paint one or two coats of your base color and let it completely dry. You want the base color to have full coverage, if you like mix the paint with the Bonding Agent for better adhesion. See how well the Milk Paint worked on the Efex Appliques? They are porous so the paint soaks in without needing the Bonding Agent.
Step 2 – Once the first color is fully dry, it’s time to apply the Hemp Oil! Make sure you apply it randomly, otherwise it tends to look spotty. One of the best ways to apply is with a spray bottle. Dilute the Hemp Oil down with odorless mineral spirits so the sprayer won’t clog. We usually start with 70% oil to 30% solvent and go from there. Once mixed turn the sprayer on mist and spritz away!
It’s a good idea to work in smallish areas depending on the size of the piece. If the Hemp Oil sits too long on the first coat of paint it will be absorbed and won’t act as a resist.
Have your second color paint premixed before applying the oil so you can jump right into step three.
Step 3 – Immediately after applying the Hemp Oil start applying the second color. You will notice the paint will separate and want to resist immediately where the oil is. In this photo you can see the wet paint, and in the section below it is drying and already getting some lift.
The Hemp Oil resists the paint and keeps it from adhering. DO NOT over-work it! We know that it’s hard to not want to crank that paint brush back and forth where the paint is separating, but this separation is a good thing. Step away from the brush and let it do its thing.
As the paint dries you will start to see it chip off. As in the picture below.
Remember, if you over work the paint it will not resist. The photo below shows example 2. When we got to step 3 we overworked the second coat. Oops not a chip in sight.
Sigh…what to do now? Just try again, starting with step 2, but reverse the colors.
On top of the overworked coat of French Enamel, we spritzed again and painted another coat of Ironstone. This time we didn’t over brush.
You can see the paint is immediately resisting.
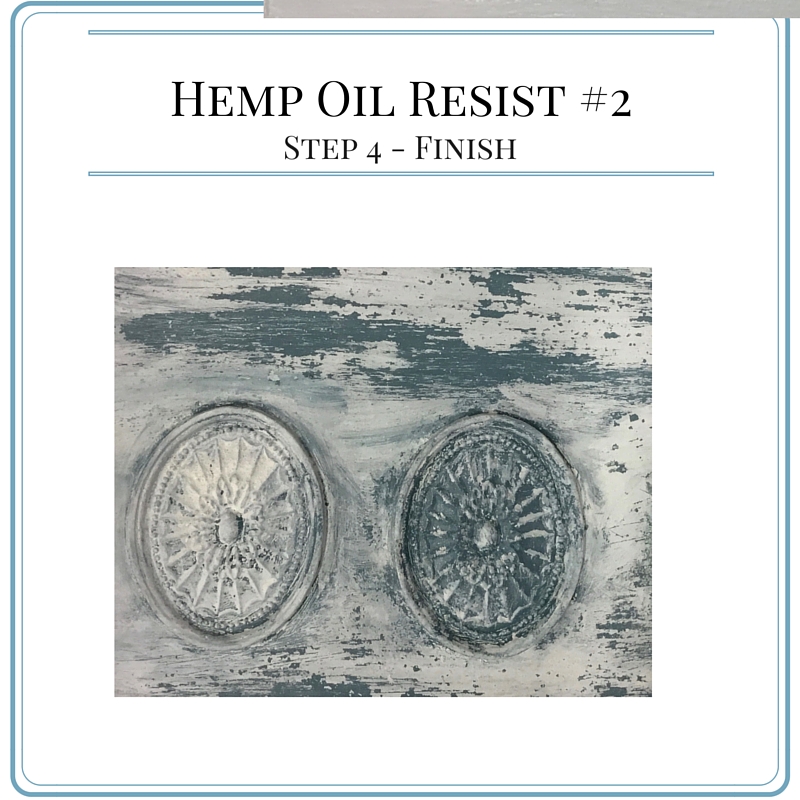
Since this is a sample board we decided to again play with overworking the brush. The rosette on the right side is the overworked one, while the left side was left to chip.
Finally we get to the finish coat.
Step 4 – When the final coat has dried, lightly sand the surface where you see chipping. You can also use a putty knife, but be gentle! Dust off the surface, and then you can seal with a topcoat like Furniture Wax or MMS Tough Coat Sealer.
The dresser below was done with a base coat in MMS Ironstone and a top coat of MMS Artissimo.
Remember, chippiness is not predictable so try not to get frustrated! Just go with the flow. If you only want a little chipping, make certain you go light on the Hemp Oil.
We even did the lovely large cabinet (above) using a resist and it looks so authentic you can’t tell that it’s a new paint job.
Next week on making patina you’ll see how to get the chippy look with a special ingredient using Annie Sloan Chalk Paint®.
If you have any questions we are always available via phone or email. Or check in with any of our retailers for an in-person demonstration. Caio, until next time…
They tell us here at Efex Youtube is the place to be for videos. So…we’re now joining the rest of you in the 21st century. Introducing our new YouTube channel!
We have put together a series of fun videos to show you how to apply Efex as well as showing you the versatility of our bendable moldings. From lamps to Mora clocks and all sorts of other furniture you can get great ideas on finishing as well.
You can also view videos that our retailers have done showing off the versatility of our Efex bendable moldings. But that’s not all! Very soon we’ll be launching a series of our own videos the highlight all the ins and outs, tips and tricks, and qualities that make Efex one of a kind.
Click the picture below to go to our Efex Furniture Appliques YouTube channel and view our videos as well as some from our dealers!
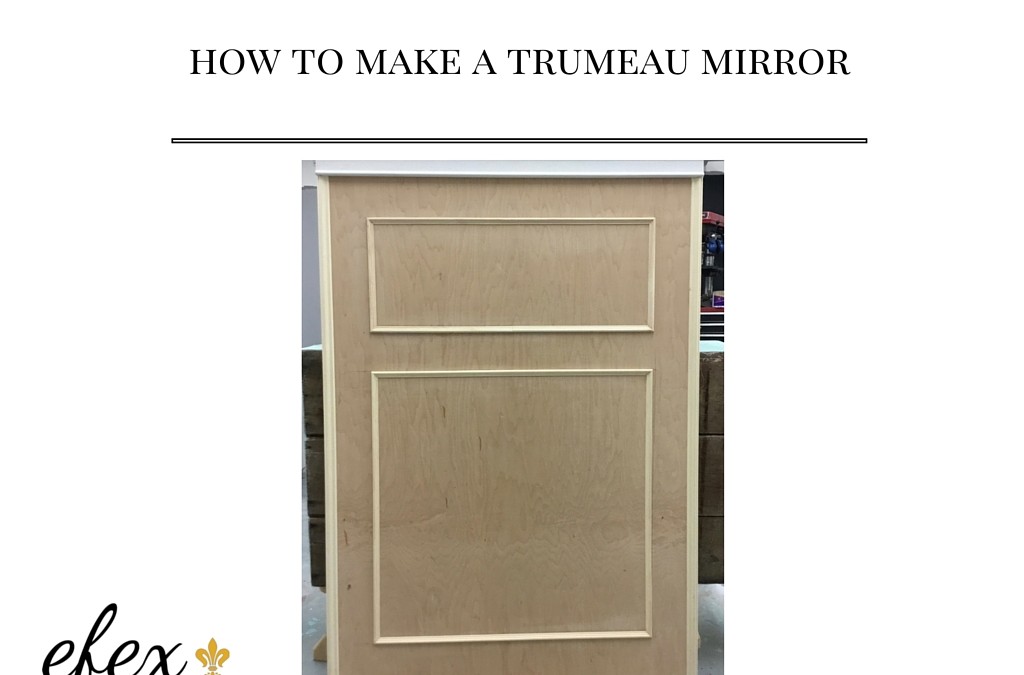
Trumeau – a mirror having a painted or carved panel above the glass in the same frame.
We think Trumeau mirrors are so special. We have seen many DIY Trumeaus like the great piece built by our friend and Efex stockist Virgina Weatherby. But we had been envisioning one that’s extra large. One day my husband suggested he could make one, so I gave him a drawing and dimensions, and look what I got back:
The process of building the frame was very straight forward.
The frame measures 6 feet by 3.5 feet. Construction starts with a single sheet of 1/4 inch birch plywood. Cut the plywood to 6′ x 3′.5″.
To lay out the mirror we measure the plywood so the mirror is 2/3’s of the length and the top area is 1/3rd of the length. You can cut the frame to any size but to make it balance you should use the golden ratio.
Using simple wood trims from the local hardware store, we trimmed out the two sections.
The top trim is 5 1/2 inches, laid on the plywood:
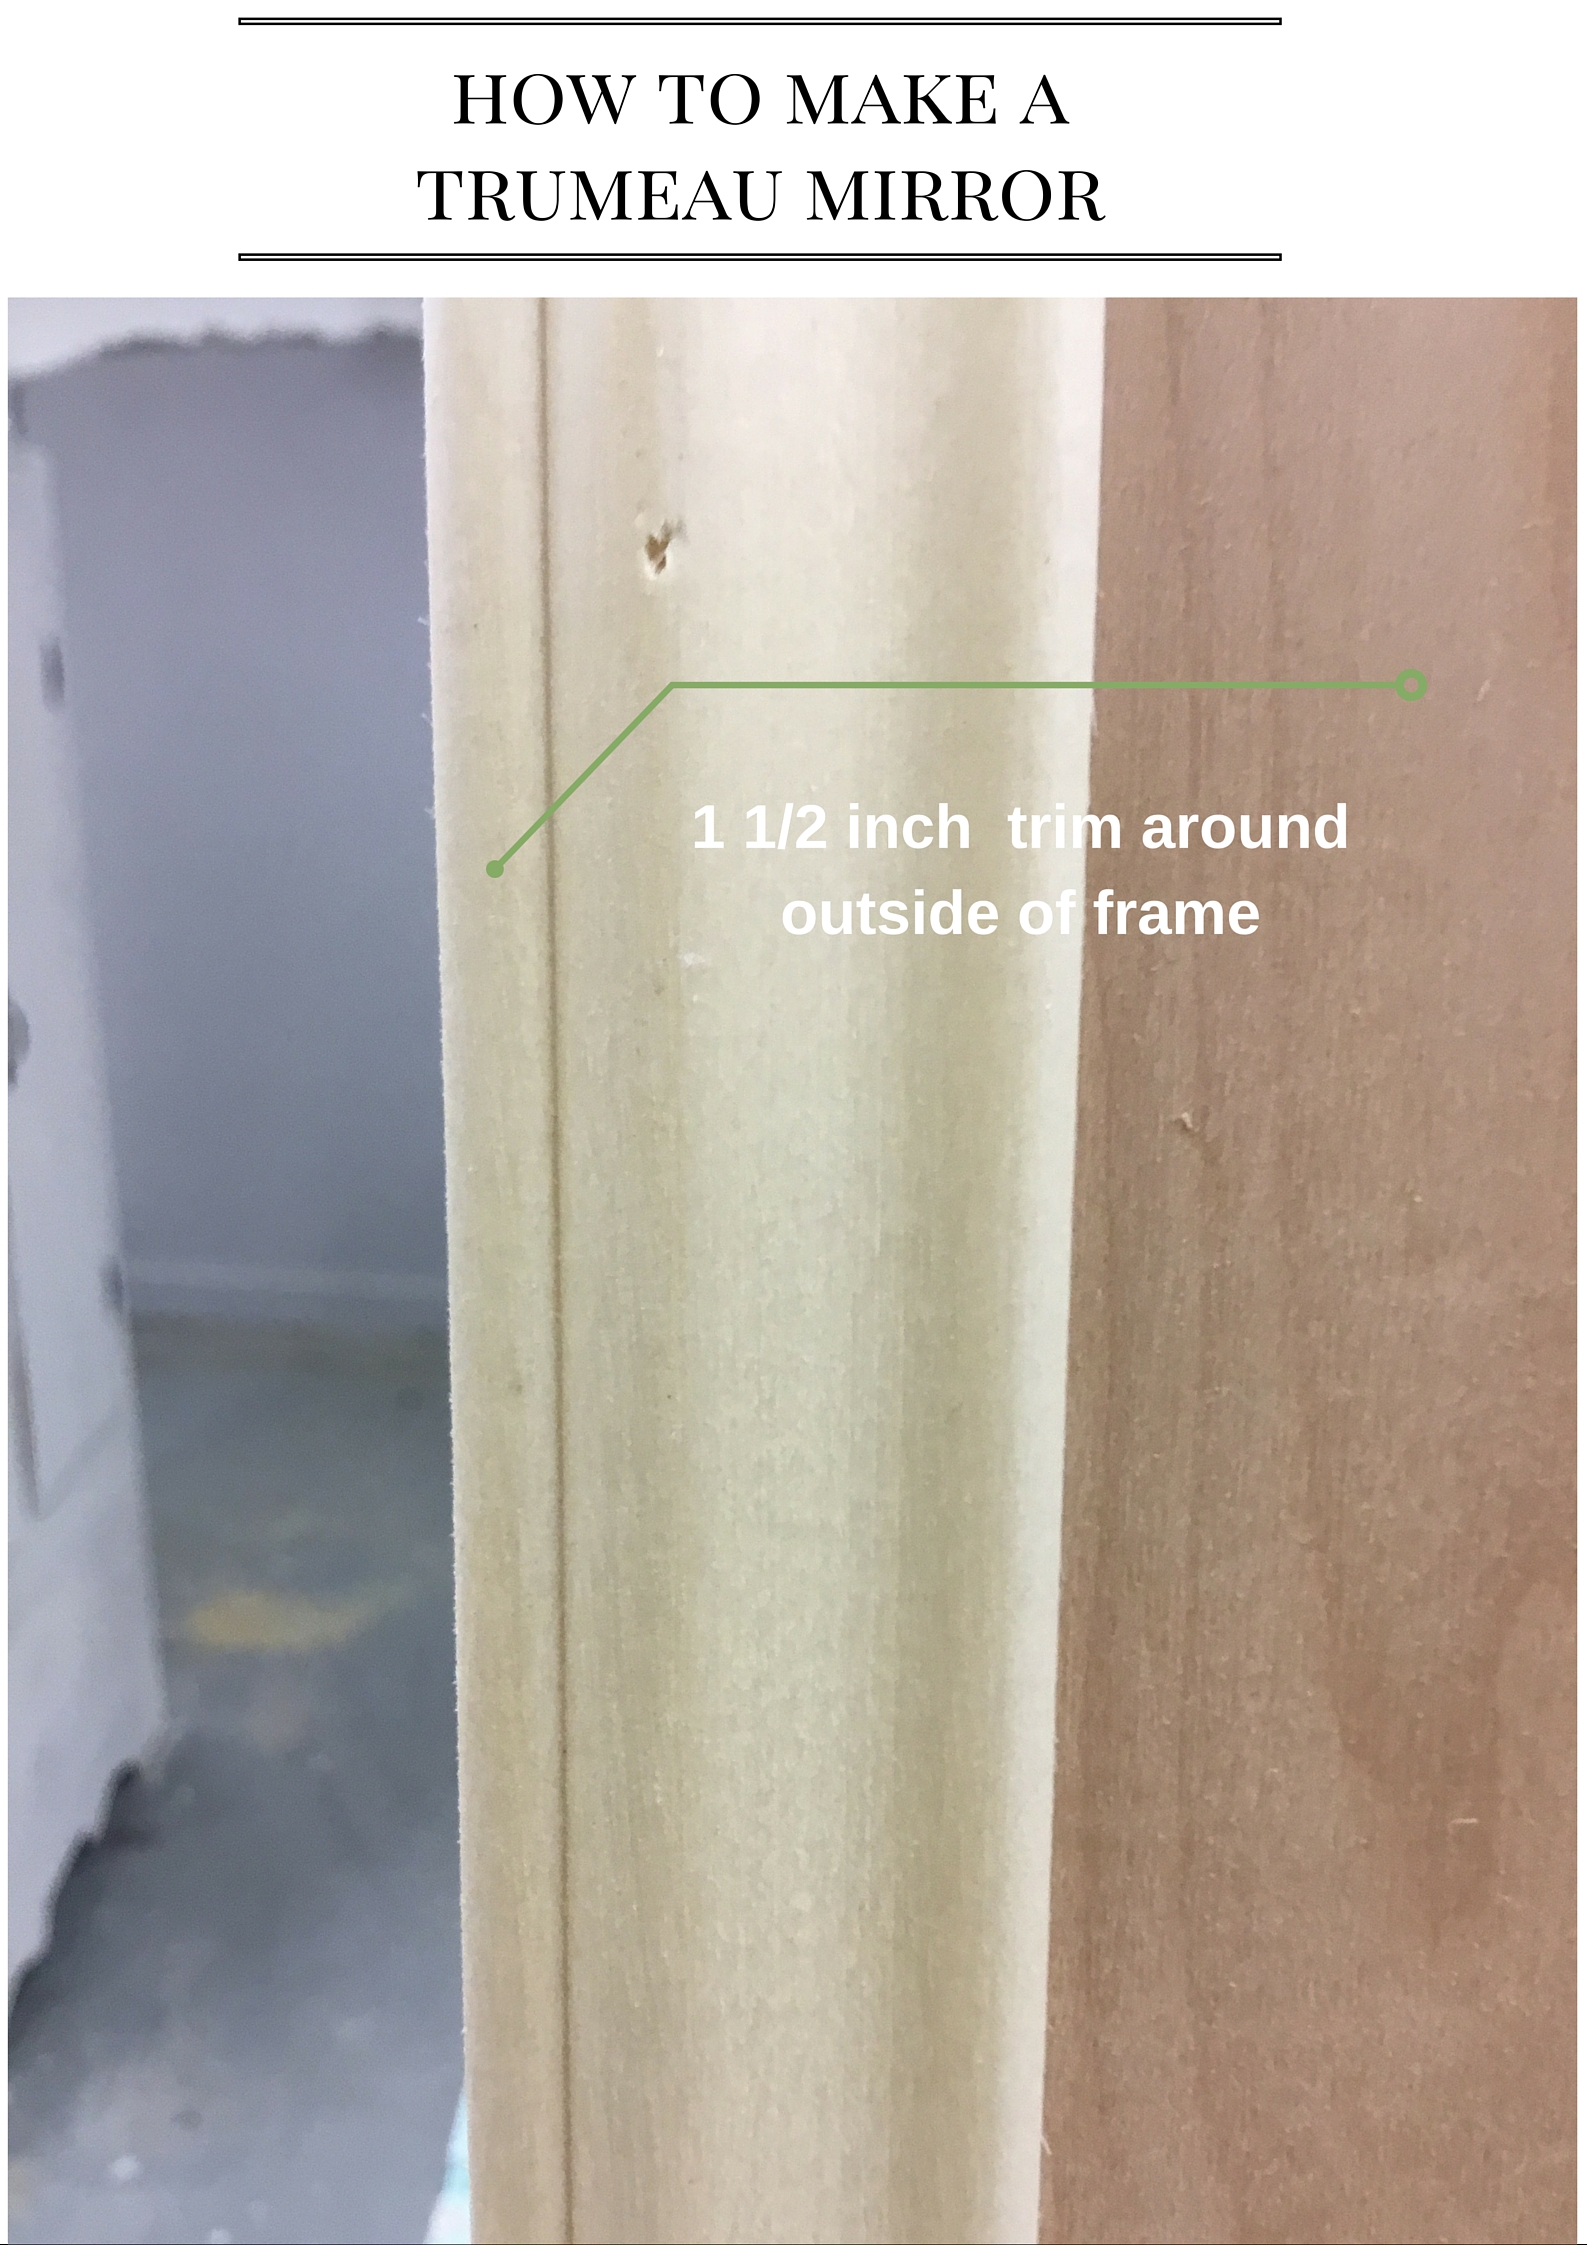
The side trim is 1 1/2 inches, again laid on the plywood:
The individual frames for the mirror and the top panel all have six-inch surrounds with 1/2 inch trim. Don’t forget to miter cut the corners of the trim, glue, then nail in place, making certain they are square.
To finish the sides we used a simple one-inch board so we did not have rough plywood edges.
Trimming Efex is easy as we see on today’s project.
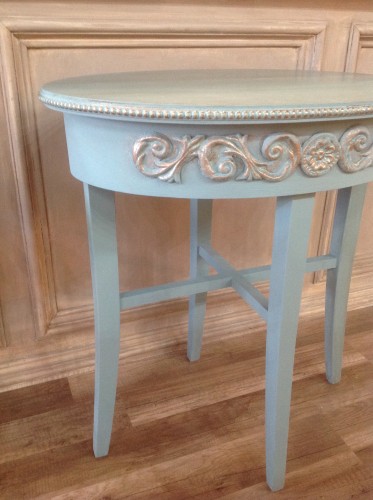
Today we’re spotlighting a ravishing redo by Mary Anne, of Brushstrokes by Mary Anne in Cumming Georgia.
Here are the pieces she used:
Around the rim-
On the skirt- T43
Clever Mary Anne cut the latex background off of her trim! This can be accomplished with scissors or a utility knife. This is a great technique is you don’t want to continue the pattern along the entire skirt but have it in one place instead.
Wonderful job! If you’re in Georgia head over to Mary Anne’s shop for inspiration and your Efex fix!